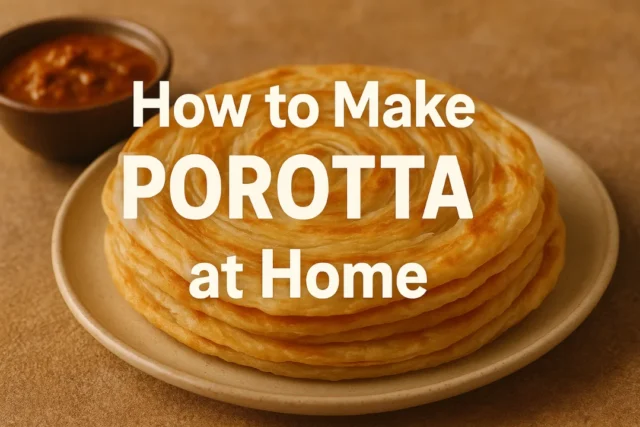
Porotta (Kerala parotta) is a flaky, layered flatbread loved across South India. With a little patience and the right technique, you can make soft, layered porottas at home that pair perfectly with curries, gravies, or simply with sugar and tea.
Contents
Ingredients
- 2 cups all-purpose flour (maida)
- 1 tsp sugar
- ½ tsp salt
- 2 tbsp oil (plus extra for layering and cooking)
- About ½ cup warm water (adjust as needed)
- Optional: 1 tsp warm milk (for softer dough)
Step 1: Prepare the Dough
In a large bowl, mix the flour, sugar, and salt. Add oil and begin adding warm water little by little. Knead until you get a smooth, soft dough (slightly softer than chapati dough). Knead for 6–8 minutes so the gluten develops and the dough becomes elastic.
Step 2: Divide & Rest
Cover the dough with a damp cloth and let it rest for at least 30–45 minutes. After resting, divide the dough into 6–8 equal balls (depending on desired porotta size). Lightly coat each ball with oil to prevent drying.
Step 3: Stretch & Layer
Take one dough ball and roll it into a thin circle or stretch it as thin as you can with your palms. Brush a little oil on the surface, then fold inwards in a fan or pleat style, or roll it into a tight spiral. Flatten the spiral gently with your palm or a rolling pin to form a disc—this creates the layers.
Step 4: Cook the Porotta
Heat a tawa or non-stick pan over medium heat. Place the flattened disc on the hot tawa and cook until brown spots appear on one side (about 40–60 seconds). Flip and cook the other side, adding a few drops of oil or ghee around edges to get a crisp, flaky finish. Cook until both sides are golden and slightly crisp.
Step 5: Fluff & Serve
Stack the cooked porottas (2–3) and gently clap between your palms or fold and toss to separate layers—this makes them airy and soft. Serve hot with chicken curry, vegetable kurma, beef fry, or your favorite side dish.
Quick Tips for Perfect Porotta
- Resting the dough is essential—don’t skip it. It relaxes gluten and helps layering.
- Use enough oil while layering; it helps form distinct flaky layers.
- Keep the tawa at medium heat: too hot will burn exterior and keep layers undercooked.
- If you struggle stretching thin, try rolling thinner discs and then pleating.
- Practice makes perfect—the first few may not be perfect, but texture improves quickly.
Note: This recipe is written for home cooks and uses simple kitchen tools—no special equipment required.


